How to Reduce Background Noise on a Mic
Learn how to reduce background noise on a mic with practical room, hardware, and software fixes that work for recordings, calls, and lectures.

You press play on a recorded lecture and hear the refrigerator start, a neighbor's dog bark, and a laptop fan rise beneath the lecturer's voice. A podcaster discovers a car alarm halfway through an interview. The speaker is present, but every sentence now competes with something that shouldn't be there.
Learning how to reduce background noise on a mic isn't about finding one perfect switch. Noise control is a layered capture-to-cleanup pipeline: the room, microphone choice, placement, gain staging, and software all contribute. If the recording enters the microphone badly, every later stage has to compensate, usually by adding watery artifacts, clipped consonants, or unnatural gaps.
Clean input beats heroic editing. The practical target is to stop noise at its weakest point before it reaches the file, then use software for careful finishing rather than rescue work.
Table of Contents
- Why Background Noise Wrecks Recordings and How to Stop It
- Quiet the Room Before You Hit Record
- Choosing a Microphone That Rejects Noise
- Mic Placement and Gain Staging
- Software and App Noise Reduction Settings
- When Noise Reduction Does More Harm Than Good
- Your Pre-Recording and Post-Recording Checklist
Why Background Noise Wrecks Recordings and How to Stop It
Background noise causes more than an unpleasant listening experience. A steady fan or HVAC hum masks quiet syllables, while intermittent sounds such as keyboard clicks, doors, and barking dogs compete directly with words. That matters for lectures and meetings because transcription systems need clean consonants and stable speech to distinguish one phrase from another.

Treat noise as a chain
I approach a noisy recording in this order:
- Room: Remove or reduce the sound source.
- Microphone: Choose pickup that suits the space.
- Placement: Keep the capsule close to the speaker and pointed intelligently.
- Gain: Capture a strong voice signal without clipping.
- Software: Remove only what remains.
Skipping the first layer creates work for the fifth. A denoiser can reduce a constant hum, but it can't make a distant voice sound as direct as one captured close to the mouth. It also can't reliably reconstruct speech buried under a sudden appliance cycle or a nearby conversation.
Practical rule: If the voice sounds far away before processing, fix distance and room reflections before touching a noise-reduction plugin.
Research on single-microphone noise reduction has continued for more than 30 years, and published systems show that results vary with the microphone arrangement, frequency range, and algorithm design. One dual-microphone spectral-subtraction system reported about 10 dB of noise reduction during speech pauses, while other adaptive systems produced average signal-to-noise improvements ranging from about 0.43 dB to 6.3 dB in different configurations, as documented in this speech-enhancement research dissertation.
Those results support a useful distinction. Noise reduction can help, but the recording setup determines how much help is available. For study audio, a modestly noisy but intelligible source is usually easier to use than a heavily processed file with missing or distorted speech cues.
Quiet the Room Before You Hit Record
The room is the cheapest part of the signal chain to improve, and it often makes the largest audible difference. A small carpeted bedroom will usually behave better than a kitchen with hard cabinets, tile, and reflective countertops. A wardrobe or closet filled with clothes can also work for voice notes because the fabric absorbs reflections around the speaker.
Start by identifying continuous noise, not just obvious interruptions. Refrigerators, HVAC systems, ceiling fans, washing machines, and window units create low-frequency rumble that software often struggles to remove without affecting the voice.
Make a short recording-day shutdown list
Before recording, work through the space rather than relying on memory:
- Stop appliances: Turn off fans, air conditioning, humidifiers, and nearby machines for the take when practical.
- Close openings: Shut windows and doors to reduce traffic, voices, and outdoor activity.
- Silence devices: Mute phone notifications, computer alerts, and smartwatch sounds.
- Manage the computer: Move a noisy PC tower away from the microphone, or record from a quieter laptop if that's practical.
- Control household traffic: Tell housemates when you're recording and avoid placing the microphone beside a kitchen or hallway.
A thirty-second pause can reveal problems that remain hidden while you're focused on speaking. Record room tone with nobody talking, then listen through headphones for hum, hiss, distant traffic, or intermittent clicks.
Reduce reflections without building a studio
Soft furnishings help control reflected sound. Put a rug over a hard floor, hang a moving blanket near reflective walls, or drape a duvet behind the microphone and speaker. These materials won't block a neighbor's bass or a truck outside, but they can reduce the hollow, distant quality caused by early reflections.

Don't confuse absorption with soundproofing. Foam and blankets mostly change reflections inside the room. They won't make a thin wall block a loud appliance, so source control and microphone direction still matter.
Independent listening research found a mean directional-microphone advantage of 3.3 dB, while combined noise-reduction technologies produced a mean benefit score of 7.01 across noise types, compared with 3.28 for digital noise reduction alone, according to this dissertation on listening and communication conditions. The practical lesson is straightforward: improve the room and pickup pattern before asking software to do everything.
Choosing a Microphone That Rejects Noise
Microphone selection should follow the room, not a generic idea of which microphone sounds most detailed. A sensitive microphone can produce excellent results in a quiet office and a frustrating recording in a shared apartment.
| Mic Type | Off-Axis Rejection | Best Environment |
|---|---|---|
| Dynamic handheld-style microphone | Generally strong rejection when used close to the mouth | Loud dorm, shared apartment, open office |
| Large-diaphragm condenser | Captures substantial detail and room sound | Quiet home office with controlled reflections |
| Lavalier clip-on | Close to the speaker, but pickup depends on mounting and clothing noise | Mobile recording, presentations, interviews |
| Headset boom microphone | Stable mouth distance and consistent level | Calls, online lectures, meetings, gaming |
Dynamic microphones
Dynamic microphones with tight cardioid or supercardioid patterns are often the safer choice in a noisy room. They reward close placement and can reject sound arriving from the sides and rear, although the exact result depends on the model and how accurately you aim it.
A dynamic microphone suits a dorm, shared apartment, or open office where you can't shut down every source. The trade-off is that the speaker must stay close and consistent. Move away, and the room becomes more prominent.
Condensers
Large-diaphragm condensers capture detail, air, and room character. That can be useful for voiceover work in a quiet, treated room, but the same sensitivity may expose keyboard clacks, ventilation, chair movement, and reflections.
Lavalier and headset microphones
A lavalier works well when the speaker needs to move. Clip it securely and check for clothing rub, cable movement, and wind. A headset boom is often more dependable for calls or lecture recording because the microphone stays at a stable distance from the mouth.
Choose the microphone whose off-axis rejection matches the room's noise level, not the microphone with the flattest frequency response on a product page.
Hardware can also solve problems that software cannot. A 2024 mask-type microphone study found whispered-speech recognition remained strong without denoising, while denoisers reduced recognition by about 20% in 30–60 dB noise for conventional microphones, as reported in this research on mask-type voice capture. The decision isn't always which setting removes more noise. Sometimes it's whether the microphone should capture the voice differently in the first place.
Mic Placement and Gain Staging
Placement is where most home recordings either become usable or become salvage jobs. Put the microphone 4 to 6 inches from the mouth, angle it roughly 20 to 30 degrees off-axis, and keep that distance steady while speaking.

For a USB or XLR microphone on a boom arm, point the capsule toward the mouth without placing it directly in the line of the breath. Speaking slightly across the capsule reduces plosives while retaining a full voice. Mount a headset or lavalier near the corner of the mouth rather than below the chin, where the voice becomes weaker and room sound takes over.
Build a stronger direct signal
Close-miking increases the voice relative to the room. That lets you use less input gain, which reduces the amount of distant noise entering the recording. It's usually more effective than turning down a noisy recording after the fact.
Use a pop filter about 1 to 2 inches from the capsule. Outdoors, add a foam windscreen, and use additional wind protection when moving air reaches the microphone. A pop filter won't remove HVAC rumble, but it prevents bursts of air from overwhelming the capsule during words beginning with forceful consonants.
Set the input meter deliberately
Set the gain while speaking at a normal conversational level. Aim for ordinary peaks around -12 to -6 dBFS, leaving roughly 6 dB of headroom for laughter, emphasis, or a sudden louder sentence.
- If peaks reach 0 dBFS: Lower the gain and record another test sentence. Clipping cannot be cleanly undone.
- If the voice barely rises above the noise floor: Move closer first, then raise the gain only as needed.
- If the level changes dramatically: Stabilize the microphone position or use a headset boom.
Listen to a ten-second test through headphones before recording the full lecture or meeting. The meter can look acceptable while the mic points toward a fan, rubs against clothing, or captures a constant electrical buzz.
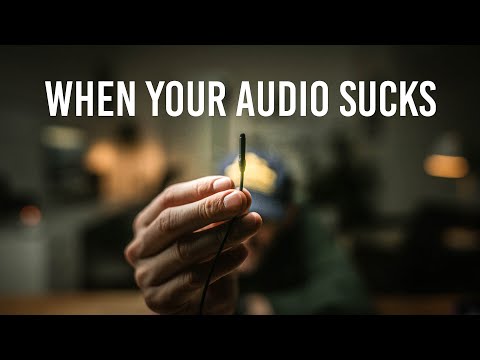
A setup demonstration can help you judge distance and angle visually:
Research on hardware-plus-software capture recommends preventing noise from entering the signal rather than relying on post-processing alone. In controlled tests, speech intelligibility remained at or above 97.7% across tested signal-to-noise ratios, with mean scores of 99.1% to 99.8% depending on the algorithm, suggesting that reduced listening effort can be a larger benefit than a dramatic change in word recognition. The same hardware and software noise-reduction study also found that single-microphone algorithms generally didn't significantly improve intelligibility except in one tested noise condition.
Software and App Noise Reduction Settings
Software works best after the source is already intelligible. Start by removing isolated events, then address steady noise, and finally check whether the voice still sounds natural.
Use the least destructive sequence
Edit loud bumps first. A short cut or crossfade can remove a door slam or keyboard strike without processing the entire recording. Preserve a little natural room tone between phrases instead of replacing every pause with absolute silence.
For steady broadband noise, capture 1 to 2 seconds of pure room tone and use it as the profile in Audacity's Noise Reduction effect. A conservative starting point is 9 to 12 dB of noise reduction, sensitivity around 6, and frequency smoothing at 3. These values are starting points, not universal prescriptions. Listen for consonant damage and reduce the amount if the voice becomes watery.
Free workflows can also use ReaPlugs for an open-source processing chain. Paid options such as iZotope RX Voice De-noise, Adobe Podcast Enhance Speech, and Krisp use more automated models. Begin at the default intensity, then increase it only while artifacts remain inaudible.
For people recording classes or meetings, capture quality also depends on the meeting workflow. The practical setup guidance in this Google Meet call recording guide is useful when the audio source comes from a live online session rather than a standalone microphone.
| Tool | Best For | Recommended Setting |
|---|---|---|
| Audacity Noise Reduction | Steady fan, hiss, or room noise | Use a short noise profile and start gently |
| ReaPlugs | Flexible low-cost desktop processing | Build a light reduction chain and monitor artifacts |
| iZotope RX Voice De-noise | Detailed spoken-word cleanup | Start at default intensity |
| Adobe Podcast Enhance Speech | Fast voice cleanup for creators | Compare against the untreated file |
| Krisp | Live calls and voice chat | Enable suppression, then verify speech fidelity |
| Zoom suppression | Meetings and remote classes | Use “Suppress background noise” at High when needed |
| Windows Noise Suppression | System-level Windows calls | Enable it under System, Sound, and Noise Suppression |
| macOS Voice Isolation | FaceTime and supported conferencing apps | Turn on Voice Isolation for live speech |
| Mobile mic app filter | HVAC rumble below the voice range | Try a high-pass filter around 80 to 100 Hz |
Always perform an A/B check at moderate listening volume. If the processed version sounds cleaner but less human, back off. Live suppression can also prioritize call clarity over the natural tone needed for recorded lectures, interviews, and accurate notes.
When Noise Reduction Does More Harm Than Good
More reduction isn't automatically better. Heavy processing can create watery consonants, metallic tails, hollow vowels, and a pumping effect where pauses collapse unnaturally before the room sound returns.
That damage affects transcripts as well as listening. Denoisers can smear sibilants and other acoustic cues that speech-recognition systems use to separate phonemes. A student may receive study notes with wrong homophones or missing words, even though the waveform looks impressively flat.
The correct target is the lowest reduction that makes the noise unobtrusive on ordinary speakers, not the highest reduction that removes every visible trace from the waveform.
Be especially cautious with recordings that contain reverb, clipping, or a distant speaker. Noise suppression can't reliably repair all three at once. A recent evaluation of deep-learning enhancement models reported SNR gains of +71.96%, +64.83%, and +364.2% across different datasets, which demonstrates both the potential and the variability of AI enhancement. The comparative speech-enhancement evaluation makes the trade-off clear: performance depends heavily on the dataset and noise type.
Export the file in a format suited to the next step, and preserve the original. This audio file formats guide can help you choose a practical format for editing, sharing, and transcription without treating compression as a noise fix.
If a sensible pass still leaves the recording unpleasant, re-record closer to the microphone in a quieter space. Another plugin rarely solves a capture problem that started with distance, clipping, or excessive room sound.
Your Pre-Recording and Post-Recording Checklist
Noise control becomes repeatable when you split it into two short routines. The first protects the source. The second applies restrained recovery without destroying the raw material.
Before recording
- Close the space: Shut windows and doors.
- Pause mechanical noise: Turn off fans and AC for 30 seconds when practical.
- Silence alerts: Put phones and computers into a quiet notification mode.
- Set placement: Keep the microphone 4 to 6 inches from the mouth and slightly off-axis.
- Check gain: Set normal peaks around -12 dBFS, with louder peaks staying below clipping.
- Record a test: Capture 10 seconds, then listen for hum, hiss, rubbing, traffic, and room tone.

After capture
Back up the raw file before processing. Then apply a gentle broadband denoise pass, roughly -12 to -18 dB, only if the recording needs it. Use targeted declicking or dehum afterward, and only where the problem is audible.
For a finished spoken-word master, export at -16 LUFS and listen again through the same transcription or study workflow you'll use later. A file can sound acceptable through studio headphones yet fail when played through ordinary laptop speakers or sent to a transcript engine.
The same source-first approach applies to recording lectures for later study. A clean signal takes seconds to test and capture. Rescuing a noisy one with aggressive plugins can consume hours and still leave artifacts that harm both comprehension and transcription.
ClassLecture.ai lets you upload or record lectures and meetings, turn them into searchable transcripts, and generate summaries, flashcards, and conversational study support from your own material. Capture your next session with the room and microphone steps above, then visit ClassLecture.ai to turn the cleaner recording into a more useful study resource.
The ClassLecture.ai Team
We build ClassLecture.ai, the AI study assistant that turns your recorded lectures into transcripts, summaries, flashcards, and answers cited to the exact timestamp — so you learn faster from your own professor's words.
Keep reading
English 101 and 102: Key Differences, Goals, and Tips
Compare English 101 and 102 to understand their goals, assignments, and how to study effectively for both courses.
ReadAP Art History Notes: 10 Resources for Better Study
Find AP Art History notes, flashcards, timelines, and study guides for the AP 250, plus ways to turn lectures and readings into better revision materials.
Read10 Check in Questions for Classes and Meetings
Discover 10 check in questions for classes and meetings, grouped by well-being, comprehension, and progress, with example phrasing and async tips.
Read