How to Convert Voice Memo to MP3: Free Methods Compared
Learn how to convert voice memo to MP3 on iPhone, Mac, Windows, or with FFmpeg, pick the right bitrate, and keep recordings private before uploading.
You've just recorded an hour-long lecture on your phone, but the upload form, your study tool, or the person you're sharing it with wants an MP3, not the .m4a file your recorder produced. That's the usual moment people search for how to convert voice memo to MP3 and reach for the first online converter they find. I'd pause before uploading. The conversion itself is simple. The better question is where your audio travels while it's converted, what bitrate you choose, and whether the finished file still contains the full lecture.
Table of Contents
- Choose a Conversion Method for Your Device
- Pick a Bitrate and Estimate the File Size
- How to Convert a Voice Memo Step by Step
- Batch Convert Memos with FFmpeg
- Fix Common Conversion Problems
- Upload the MP3 and Confirm the Transcript
Choose a Conversion Method for Your Device
The conversion route is a privacy decision as much as a format decision. Where the audio travels while it is converted determines how much control you keep over a lecture that may contain names, patient details, or copyrighted course material.
Five ways to convert a voice memo to MP3
| Method | Platform | Works offline | Effort |
|---|---|---|---|
| Music app (Create MP3 Version) | macOS | Yes | Low |
| Audacity with LAME encoder | Windows, macOS, Linux | Yes | Medium |
| FFmpeg command line | Windows, macOS, Linux | Yes | Medium to high |
| Phone converter app | iPhone, Android | Yes, if on-device | Low |
| Browser-based online converter | Any browser | No, file uploads to a server | Low |
For one or two memos on a Mac, the Music app is enough once you've set MP3 as the import encoder. Audacity suits quick trims before export. FFmpeg suits repeat work across many files because the settings stay consistent from one batch to the next. Phone and browser tools are easiest to start, but they carry different trade-offs.
A browser converter is fine for a harmless test file, and you can convert M4A audio with RenderIO without installing anything. The trade-off is that the file leaves your device. Treat every upload as a copy you cannot control once it reaches the server, and reserve browser tools for audio you would be comfortable sending to a third party.
Why renaming the file won't work
Voice Memos exports .m4a by default. Changing that ending to .mp3 doesn't produce an MP3, because the audio inside hasn't changed. You need a tool that decodes the recording and re-encodes it in the new format. That step is where bitrate, sample rate, and channel settings get fixed, so the converter you choose also determines what quality you can control.
The privacy difference that matters
Lectures, patient-related discussions, workplace meetings, and copyrighted course audio can all sit in an ordinary looking memo. An offline tool keeps the audio and the converted file on your machine. A browser converter creates a copy on someone else's server. A phone app may work on-device, but app permissions and background uploads still deserve a look before you trust it with a sensitive recording. Those are different levels of exposure even when the output MP3 sounds identical.
Use this decision rule:
- Confidential memo: Use an offline tool and keep the original untouched.
- One memo, no installs: Use a trusted built-in or on-device phone option.
- Many files: Use FFmpeg so bitrate, metadata, and naming stay consistent across the batch.
Pick a Bitrate and Estimate the File Size
Bitrate and duration set file size, so bitrate is the one numerical choice worth getting right. The calculation is simple: multiply the bitrate by 60 seconds and divide by 8 to get bytes per minute. At 128 kbit/s, that's about 960 kilobytes per minute before container overhead, or roughly 57.6 megabytes for one hour. Metadata and encoder settings add small differences, and variable bitrate encoding can shift the final size.
MP3 bitrate and file size for speech
| Bitrate | Best for | MB per minute | MB per hour |
|---|---|---|---|
| 64 kbit/s | Short memos where storage is tight | 0.48 | 28.8 |
| 128 kbit/s | Default for speech and lectures | 0.96 | 57.6 |
| 160 kbit/s | Noisy rooms or distant speakers | 1.20 | 72.0 |
| 192 kbit/s | Interviews or music-heavy memos | 1.44 | 86.4 |
For scale, an MP3 at 128 kbit/s is far smaller than uncompressed LPCM audio at CD quality, which is 44.1 kHz and 16-bit depth. That matters if you're weighing MP3 against an uncompressed export. It doesn't mean MP3 beats your original .m4a on quality. MP3 mainly wins on compatibility, smaller files, or a specific upload requirement, a distinction our guide to audio file formats also keeps in view.
A practical default for speech
I'd start with 128 kbit/s mono for a single speaker, lecture, or meeting where there's no meaningful spatial information to keep. Mono can reduce storage and transmission requirements compared with stereo for that kind of source. Drop toward 96 kbit/s only when upload limits are tight and the recording is clear. Move to 160 to 192 kbit/s for crowded rooms, distant phone recordings, overlapping voices, or music.
Bitrate changes file size and quality, not where the audio goes. If a browser converter is in the path, a smaller file means less to upload, but the recording still leaves your device. A local encoder avoids that question, and the few megabytes you save rarely justify sending a sensitive memo to a third party.
Pick the lowest bitrate that keeps speech easy to understand, then check intelligibility before you trust the smaller file.
How to Convert a Voice Memo Step by Step
Conversion means transcoding the recording into MPEG Audio Layer III, not relabelling it. MP3 uses perceptual coding based on psychoacoustic models, so it reduces or discards audio information judged less audible to human hearing. Because that process is lossy, converting an already compressed .m4a can't restore detail that isn't there. Keep the source file.
The flow below shows the export, selection, and save stages in order.
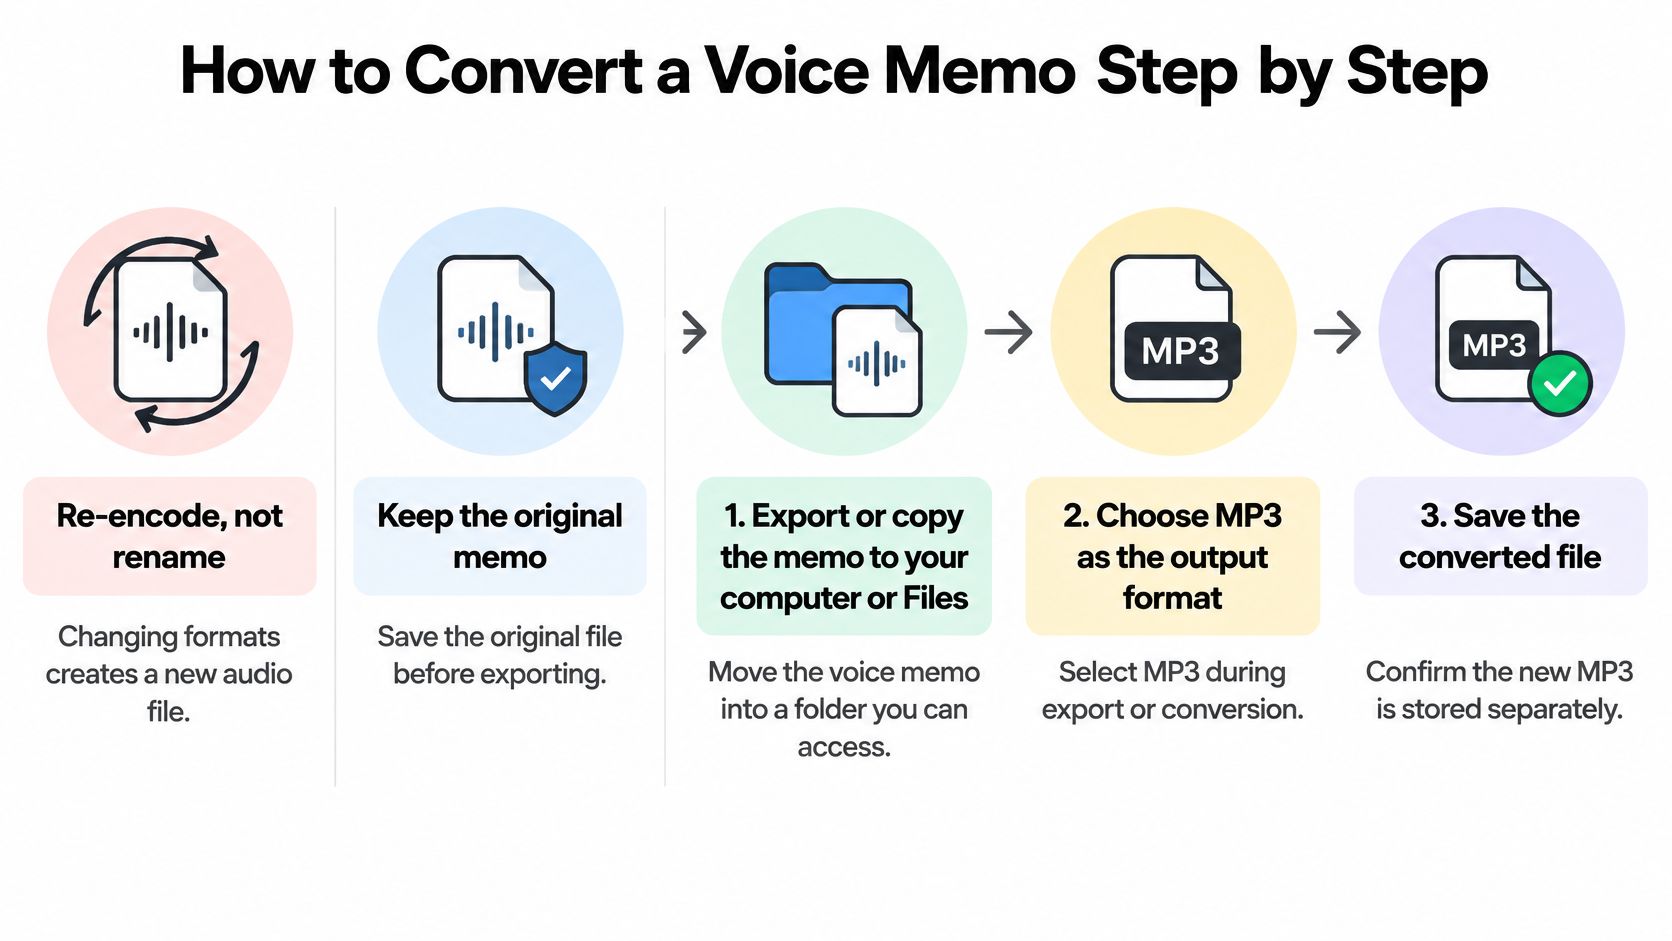
- Export or copy the memo. Save it to Files or your computer and leave the original untouched. Apple's guide to exporting a recording to Files covers the iPhone handoff. Don't convert the only copy in place.
- Note the duration. Open the memo in a player and write down its length. You'll need that number to spot a preview-only export later.
- Open your converter and choose MP3. Confirm the output format in the export settings, not just in the filename. A tool that only renames the file hasn't converted anything.
- Set the bitrate. Use 128 kbit/s for clear speech, or 160 to 192 kbit/s for noisy lectures. Moderate bitrates are often adequate for speech, while higher settings preserve more information in larger files.
- Set channels and sample rate. Choose mono for one speaker and keep the sample rate at 44.1 or 48 kHz. Check these alongside the extension and bitrate before exporting.
- Export to a clean filename. Use a new name without spaces or symbols, such as lecture-week3.mp3. Clean names prevent avoidable problems in upload forms and command-line tools.
- Play the whole MP3. Compare its duration with the original and listen closely to the first and last 10 seconds. Then scan a loud passage for crackle caused by a gain boost.
The check that matters most: The MP3 must match the original duration. If it's shorter, you don't have the full recording yet.
Two common desktop routes
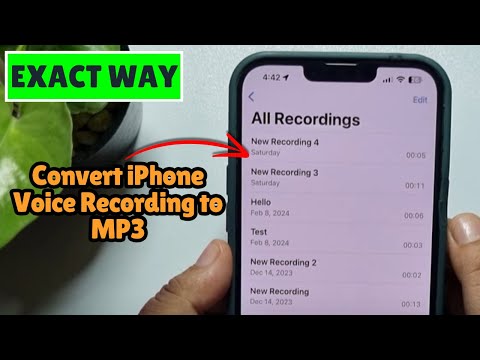
In the Music app, set Import Settings to the MP3 Encoder, select the memo, then choose File, Convert, Create MP3 Version. In Audacity, open the file, choose File, Export, Export as MP3 with the LAME encoder installed, and use the same duration check. The video below walks through the conversion visually if you'd rather follow along.
A good result sounds plain and complete. Speech is clean, loud passages don't distort, and the ending matches the memo you started with.
Batch Convert Memos with FFmpeg
FFmpeg pays off when you've got a folder of lectures and want identical settings every time. Install a build with the LAME encoder enabled first. The FFmpeg codec documentation identifies libmp3lame as its MP3 encoder wrapper and lists standard MP3 sampling rates including 44.1 and 48 kHz.
Confirm the encoder is available on Windows:
ffmpeg -encoders | findstr mp3
On macOS or Linux, use grep instead:
ffmpeg -encoders | grep mp3
For one speech file at a constant 128 kbit/s, run:
ffmpeg -i input.m4a -map_metadata 0 -c:a libmp3lame -b:a 128k output.mp3
That command maps metadata across, selects the MP3 encoder, and gives you predictable size and broad compatibility. For clearer speech or mixed lecture audio, 160 to 192 kbit/s CBR is safer. If you prefer quality-based variable bitrate, -q:a 2 averages roughly 170 to 210 kbit/s, while -q:a 6 averages about 100 to 130 kbit/s.
Batch commands
On macOS or Linux, loop over every .m4a in the folder:
for f in *.m4a; do ffmpeg -i "$f" -map_metadata 0 -c:a libmp3lame -b:a 128k "${f%.m4a}.mp3"; done
On Windows, use the same settings inside a PowerShell loop over the folder listing. Quote filenames with spaces, or rename them first. For confidential memos, replace the metadata option with -map_metadata -1. That strips title, date, location, and device tags before the file goes anywhere.
Watch for these pitfalls:
- Clipping from gain changes: Don't raise volume during conversion unless you've checked the loudest passage.
- Lost metadata: Omitting the metadata map can drop information you wanted to keep.
- Upsampling: Specifying
-ar 48000can't restore detail from a low-rate source. - False confidence: A bitrate number doesn't guarantee quality if the source is poor.
After conversion, compare durations, listen to both ends, and inspect each file with ffprobe before uploading it.
Fix Common Conversion Problems
Thin, tinny speech is the complaint I hear about most, and it's usually self-inflicted. Someone exports a lecture at 64 kbit/s, hears the damage, then tries to fix the MP3 itself. Don't do that. Go back to the original .m4a and convert again, because re-encoding an MP3 loses more detail.
Conversion symptoms, causes and fixes
| Symptom | Likely cause | Fix |
|---|---|---|
| Speech sounds thin, muffled or tinny | Bitrate set to 64 kbit/s or lower | Re-convert from the original .m4a at 128 to 160 kbit/s |
| MP3 is shorter than the memo | Export stopped early or only made a preview | Compare durations, then re-export the full recording |
| Title, date or tags missing | Metadata not carried across | Add the metadata map option and run the conversion again |
| Distortion on loud passages | Gain raised during conversion | Export without gain increase and lower the level |
| Command fails on a file name | Spaces in the path not quoted | Wrap the filename in quotes or rename the file |
Some fixes take a minute. Quoting a filename or adding a metadata flag is a quick rerun of the same job. Thin speech and distortion need a full re-export from the source at corrected settings. A short file also needs a complete re-export, since you can't recover audio the converter never wrote.
When the audio is fine but words still go missing
If the MP3 sounds clear but a transcript misses words, don't automatically blame the conversion. Speech recognition is not perfect, so anything relied on should be reviewed. Check the uncertain passage against the audio, especially names, numbers, and technical terms. If the recording itself is noisy, our advice on reducing background noise on a mic will help the next recording more than another conversion will.
Before rerunning a failed job, check four settings: bitrate, metadata flag, quoted filename, and gain level. Change one cause at a time so you know what fixed it.
Upload the MP3 and Confirm the Transcript
Once the MP3 passes your listening check, upload it for transcription. We accept lecture files from Zoom, Panopto, and phones, and formats including MP3, MP4, MOV, and M4A can be used. That means conversion is a compatibility choice for your wider workflow, not a hurdle you must clear before every upload.
The checklist below shows the handoff from finished file to confirmed transcript.
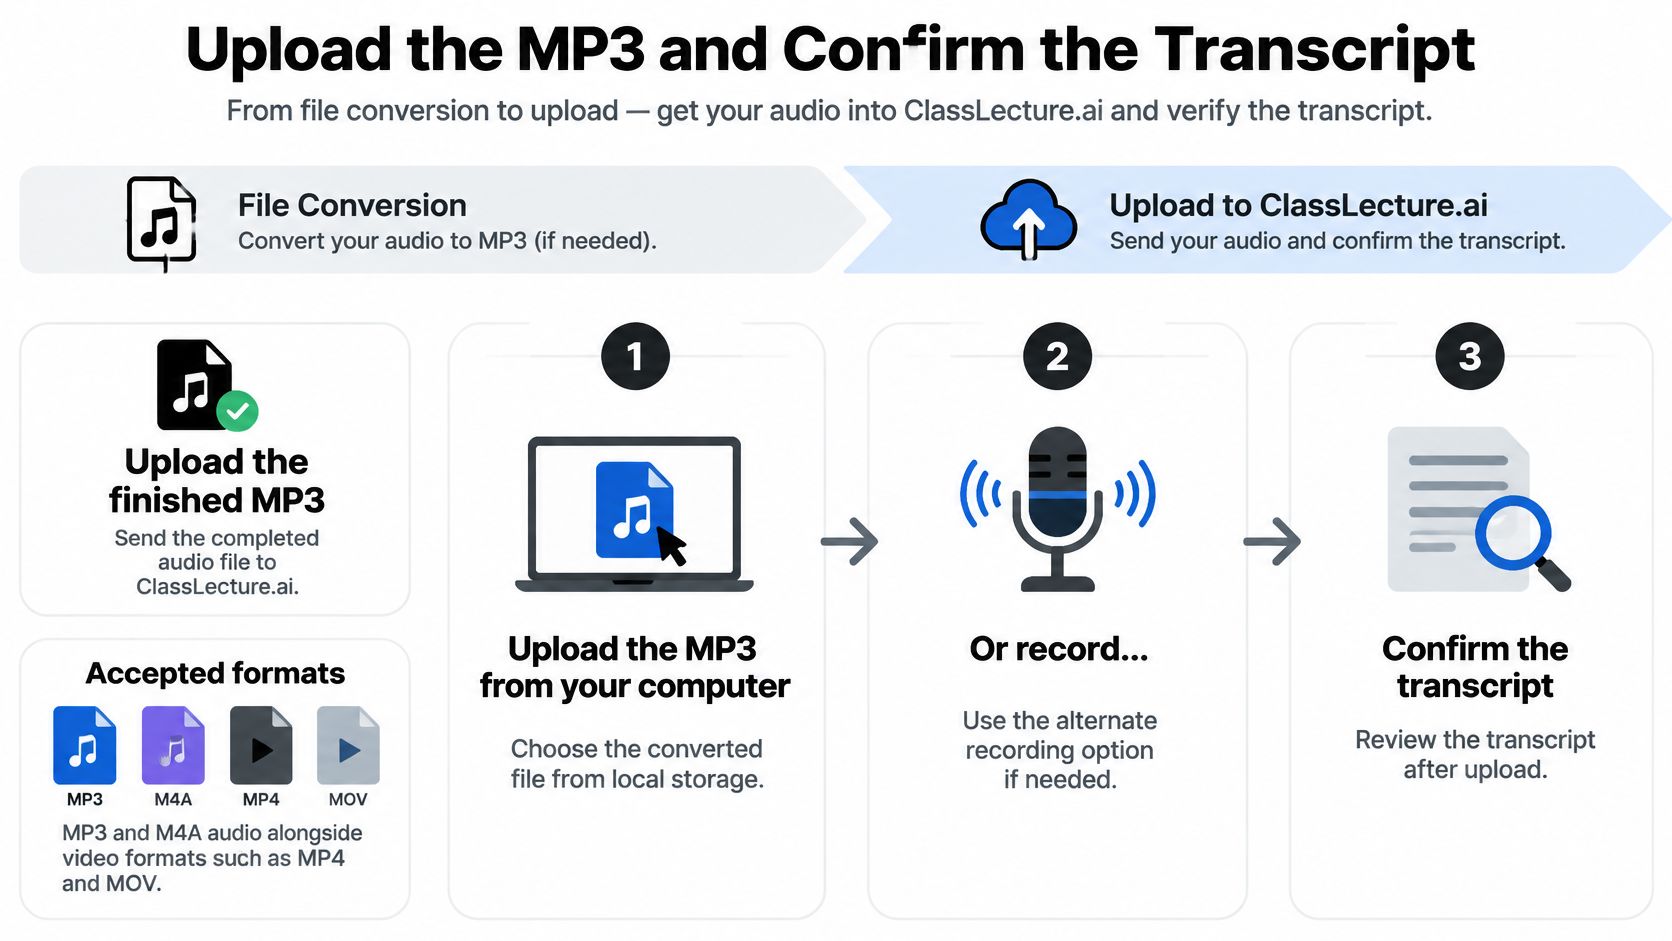
- Upload the MP3 from your computer. If the lecture is still happening, record directly in the browser instead and skip the file transfer.
- Wait for the transcript. A 1-hour lecture is typically transcribed in about 5 minutes. Use that time to keep the original memo somewhere safe.
- Scan the transcript with its timestamps. Each lecture becomes a searchable transcript with timestamps, and you can play the original audio and jump to the exact moment you want to review. Start with the passages that matter for your exam.
- Verify key terms against the audio. Check names, formulas, numbers, drug names, safety terms, or legal phrases before you rely on them. Transcription can contain errors even when most sentences look convincing.
- Generate study material only after checking. Build the summary, study guide, or flashcards from a verified transcript. A summary built on wrong text repeats those mistakes with more confidence.
If you're comparing phone workflows before this handoff, the iPhone transcription methods explained by AIDictation give useful context on getting memos off the device. For the upload and review sequence itself, our guide to transcribing audio to text follows the same verify-first order.
Keep the original .m4a until the MP3 has passed the duration check and the transcript has been verified. Archive or delete it only after both checks are done.
That final rule protects you from the two failures that are hardest to undo. You won't be stuck with a truncated MP3 as your only copy, and you won't build revision material on words nobody checked. For medical, nursing, safety, and other professional learners, that source check isn't fussy. It's the difference between studying the lecture and studying a plausible error.
Upload your finished MP3 to ClassLecture.ai to turn it into a searchable, timestamped transcript you can check against the original audio moment by moment. Once you've verified the key terms, generate summaries, study guides, and flashcards from your own lecture and start revising from material you trust.
The ClassLecture.ai Team
We build ClassLecture.ai, the AI study assistant that turns your recorded lectures into transcripts, summaries, flashcards, and answers cited to the exact timestamp — so you learn faster from your own professor's words.
Keep reading
How to Save YouTube Videos as Audio Files Legally
Learn how to save YouTube videos as audio files you are allowed to keep, choose MP3 or M4A, and import them for study.
ReadVideo Quality Settings for Lectures: What to Choose
Learn which video quality settings suit lecture recordings: resolution, bitrate, frame rate, codec and file size, plus upload tips.
ReadAudio File Formats Explained for Lecture Uploads
Learn the most common audio file formats for lectures, recordings, and uploads. Compare MP3, WAV, AAC, MP4, and more for quality and compatibility.
Read