Multi Track Record: How Multitrack Recording Works
Multi track record explained: learn what multitrack recording is, how it works, and how it differs from single-track recording, with examples.
You've recorded a podcast with a guest and a music bed. The conversation sounds good, but the music covers the guest's quieter answers. You reach for the volume control and discover that turning down the music also turns down both voices. Everything was saved together.
That's the problem multitrack recording solves. But keeping sounds separate also gives you more inputs to check, files to manage, and opportunities for timing or privacy mistakes. The useful question isn't whether more tracks are better. It's whether you'll need to change one sound without changing the others.
Table of Contents
- What Multitrack Recording Means and Where It Came From
- Single-Track vs Multitrack Recording Compared
- Planning Tracks and Routing Before You Record
- How a Multitrack Session Works Step by Step
- Sync, Bleed and Dropouts That Break Multitrack Takes
- Where Multitrack Recording Shows Up in Practice
- Choose Single-Track or Multitrack for Your Next Recording
What Multitrack Recording Means and Where It Came From
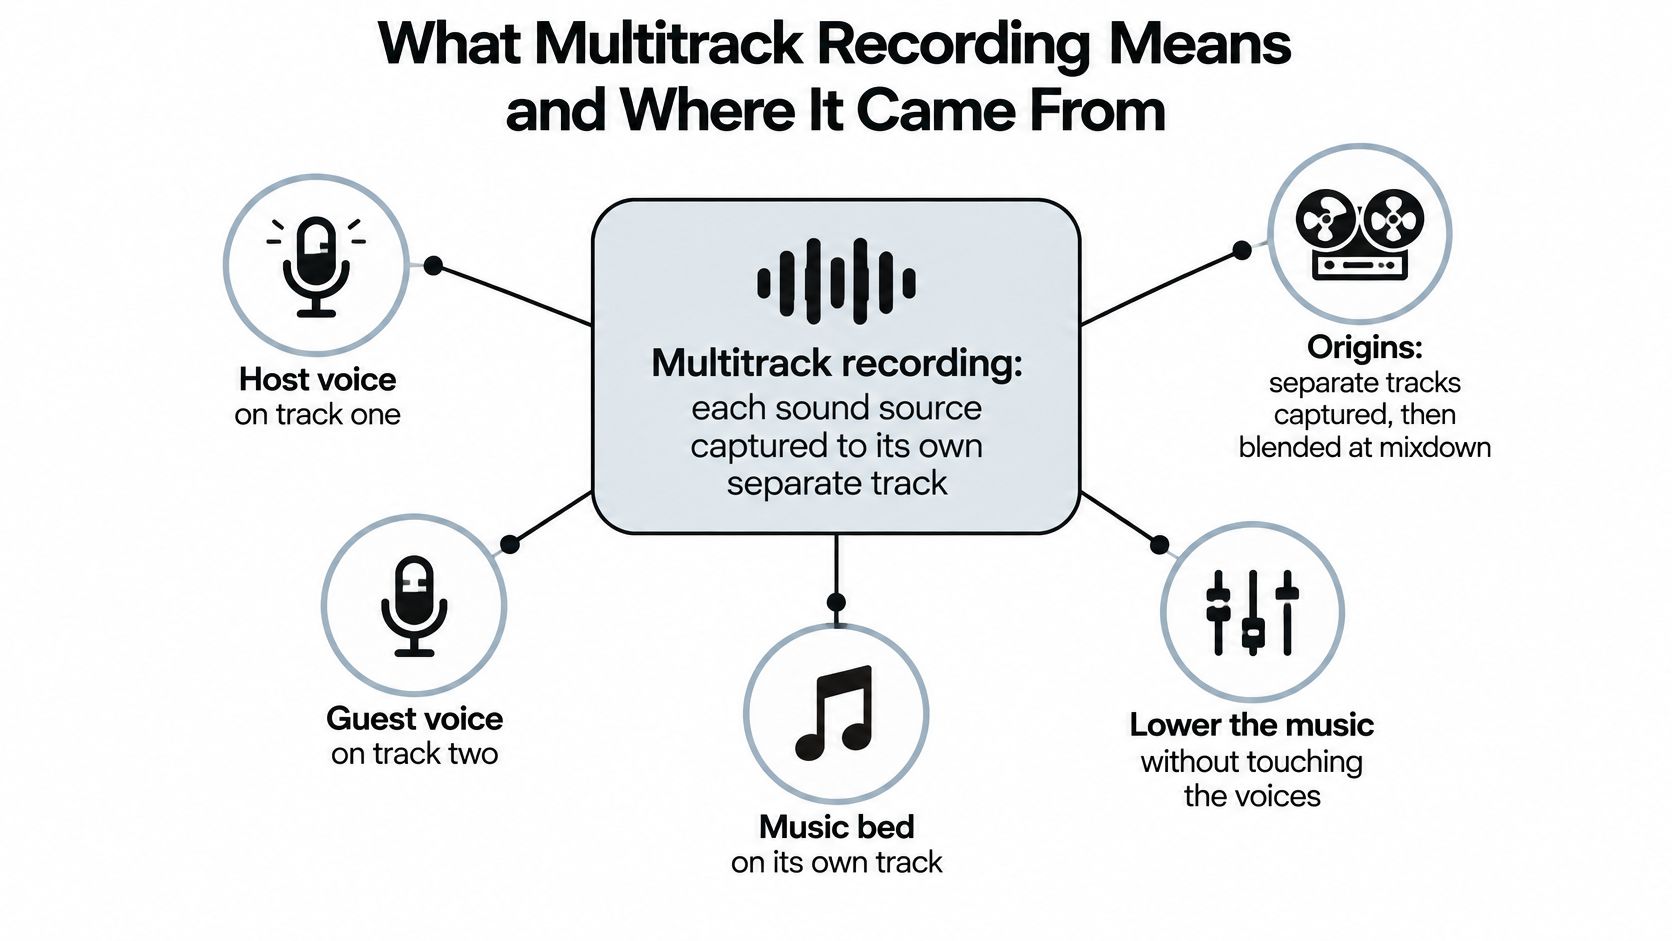
Multitrack recording means recording sound sources onto separate, independently controllable tracks. You can capture those sources simultaneously or build the recording through successive performances. What matters is that you preserve the layers rather than committing everything to a finished mix immediately.
For the podcast, you'd keep the host, guest, and music in separate lanes. During editing, you could lower the music beneath an answer, increase the guest's level, or replace the introduction without altering the conversation.
From a finished cake to separate ingredients
Think of a single-track recording as a finished cake. Once it's baked, you can cut a slice, but you can't remove just the sugar. Multitrack recording keeps the eggs, flour, and sugar separate until you're ready to combine them.
The analogy has limits: microphones don't always capture perfectly isolated ingredients. A guest's microphone might also hear the host. Separate tracks give you independent controls, not a guarantee of independent sound.
These terms make the recording screen easier to understand:
- Track: A labelled lane in an app such as Audacity, GarageBand, or Reaper, containing recorded audio.
- Source: The sound or signal you want to capture, arriving through a microphone, instrument connection, line input, or software feed.
- Overdubbing: Recording a new performance while listening to previously recorded material.
A track isn't necessarily a separate file, and a file isn't necessarily a finished mix. Recording software can store a session's audio in different ways, so check what your export contains.
The diagram shows the basic relationship between sources, tracks, and mixing controls.
How layering became independent control
Les Paul helped establish the creative possibility of building an ensemble from separate performances. The Library of Congress account of his recording experiments describes his sound-on-sound work in the late 1940s and his 1947 Capitol release Lover, which combined eight guitar parts.
Those early acetate-disc experiments weren't equivalent to today's editable digital sessions. Each added layer combined the new performance with earlier material, making mistakes difficult to undo. Paul demonstrated the power of overdubbing before engineers had the flexible track-by-track control beginners now expect.
Magnetic-tape systems subsequently gave engineers more room to preserve performances separately. The Open University's history of recording technology traces the progression summarized below, including the use of synchronized machines to extend available capacity.
Track counts by era
| Era | Typical track count | Context |
|---|---|---|
| Mid-1950s | Two or three | Quarter-inch magnetic tape machines |
| Following years | Four and eight | Intermediate formats |
| Late 1960s | Sixteen | Becoming standard in advanced studios by 1970 |
| Early 1970s | Twenty-four | Became the normal professional standard during the 1970s and into the 1980s |
| Synchronized machines | Forty-eight | Several tape machines linked to exceed individual machine limits |
With more available tracks, engineers had less reason to combine performances prematurely. They could postpone decisions about vocal balance, instrument levels, and effects until mixing.
That distinction still matters when you search for a multi track record setup. Software with many empty lanes won't help if your recorder has already combined every microphone into the same incoming signal.
Keep each source on its own track, then combine the tracks at mixdown.
Single-Track vs Multitrack Recording Compared
| Aspect | Single-track recording | Multitrack recording |
|---|---|---|
| Tracks used | One combined track | Separate tracks for sources |
| Editing | Cuts and fades affect everything in the mix | Each source can be edited independently |
| Fixing a mistake | May require replacing the whole take or affected passage | Replace one part and keep the rest |
| Mix balance | Source balance committed during recording | Source balance adjustable afterward |
| Bleed risk | Sources are already combined | Each microphone may still capture neighbouring sounds |
| Setup effort | Select the input and record | Check routing, levels, and labels |
| Typical use | Voice memo, one-speaker lecture | Band, podcast with guests, multi-source lecture |
Single-track is faster because you make fewer routing decisions. For a personal reminder or a straightforward lecture recording, that simplicity can be more useful than elaborate editing options.
Multitrack earns its extra effort when sources need different treatment. A quiet speaker might need a level increase while a noisy microphone needs muting. If those sounds are already combined, ordinary volume adjustments affect both.
Separate tracks aren't the same as stereo
Beginners often confuse stereo with multitrack. Stereo describes left and right playback channels, while multitrack describes how you organize independently controllable material.
A stereo music mix can contain an entire band without letting you adjust the singer separately. Conversely, a session containing separate mono microphone tracks can still produce a stereo finished recording.
Don't assume you need multitrack for these situations:
- A short voice note: You need to remember an idea, not rebuild the performance.
- A phone recording of one lecturer: A well-positioned microphone may serve you better than extra unattended devices.
- A recording you won't edit: Additional tracks create handling work without a clear benefit.
The comparison table describes working options, not promises of effortless repair. You can't always remove a cough cleanly if another microphone captured it too, and replacing an isolated musical part still requires a matching performance.
Choose according to the control you need after recording, rather than the number of lanes your app offers.
Planning Tracks and Routing Before You Record
Start with a source list, not the record button. Write down what you need to hear clearly and what you might want to change later.
For a discussion recording, that might mean a dedicated microphone for each participant and an optional room microphone. Don't add ambience automatically: if you only need intelligible speech, room sound may create more cleanup work than value.
A routing checklist that prevents surprises
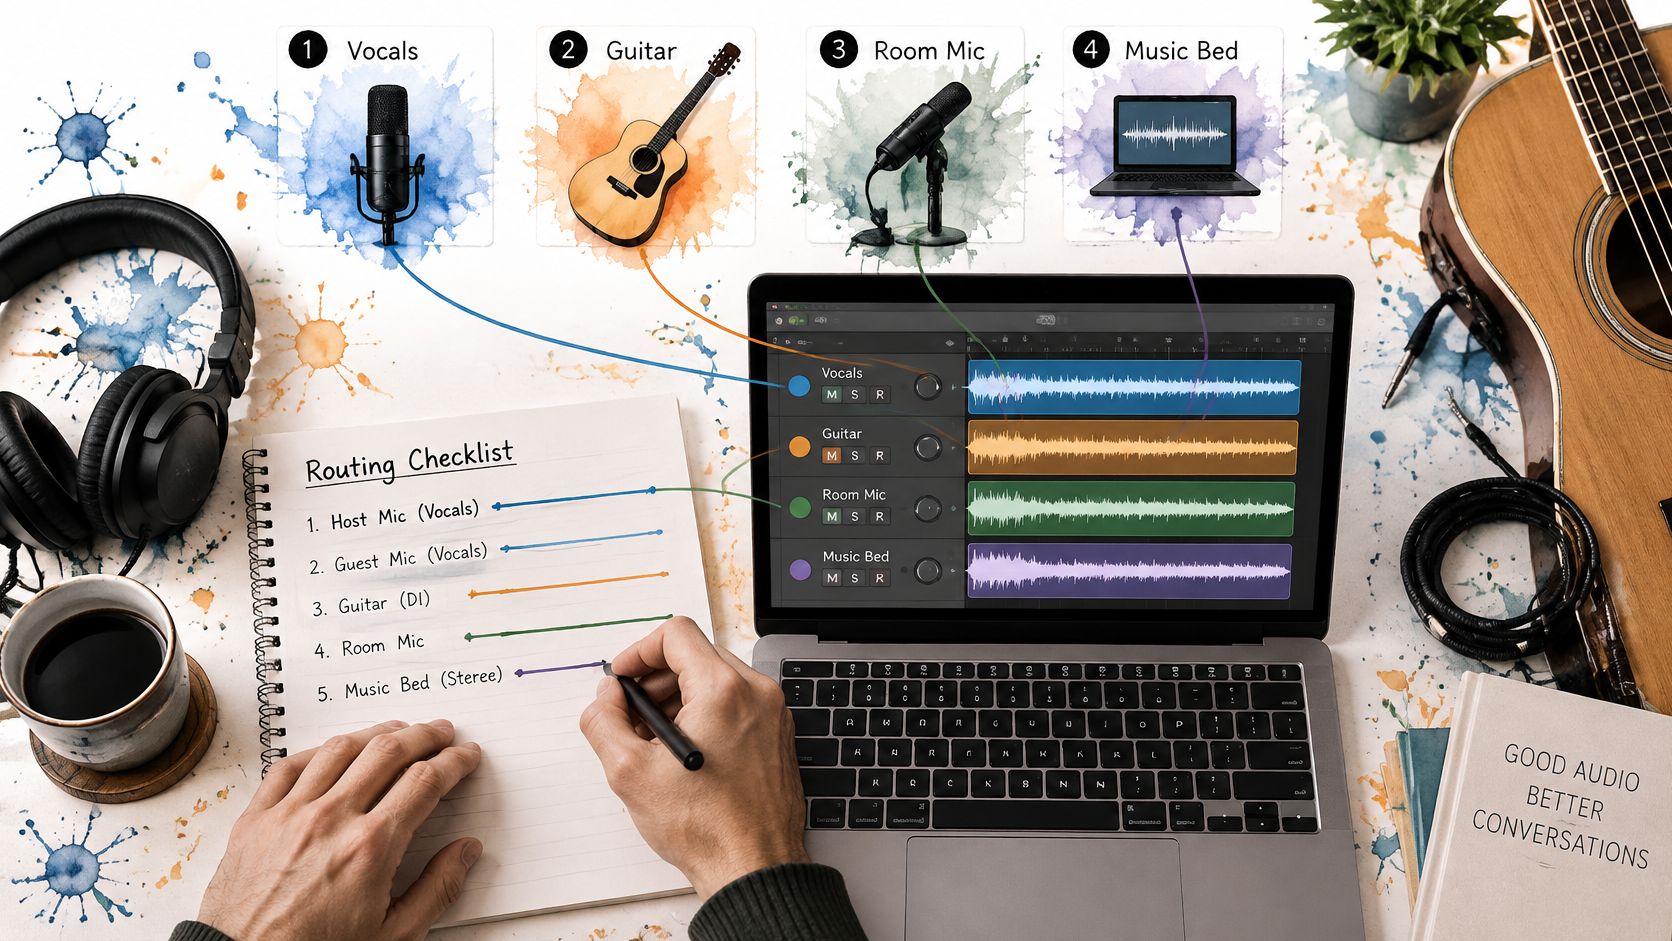
- List the sources and destinations. Write a simple mapping such as Host microphone → Host track and playback feed → Presentation audio. A software track doesn't create an additional physical input.
- Check the input type. Connect microphones to suitable microphone inputs and line-level equipment to line inputs. An electric guitar may need an instrument input or an appropriate direct box.
- Set gain using the loudest expected performance. Ask speakers to project and musicians to play forcefully. Leave visible headroom below clipping, because distorted input audio can't be repaired by lowering a fader afterward.
- Choose a consistent session format. Use a common sample rate across connected equipment and confirm whether each source should be mono or stereo. Don't turn a single microphone into unnecessary duplicate channels.
- Name tracks before recording. Host, Guest, Room, and Music are more useful than default names when you're searching for a fault.
- Make a short test and listen back. Solo each track, then play the tracks together. Confirm that the intended source appears where you expect and that other sources aren't dominating it.
Microphone placement deserves its own attention. Our guide to choosing a lecture-recording microphone can help you match the microphone arrangement to the teaching space.
Use a written routing plan beside the recording computer so you can check connections without relying on memory.
For example, you could make a thirty-second rehearsal containing ordinary speech, a louder sentence, and playback audio. Treat that duration as a convenient test, not a technical requirement.
Practical rule: If you can't name what a track is for, you don't need that track yet.
How a Multitrack Session Works Step by Step
A multitrack session can capture a live event or build a performance through overdubbing. The setup and mixing principles overlap, but a live lecture doesn't need a preliminary solo performance.
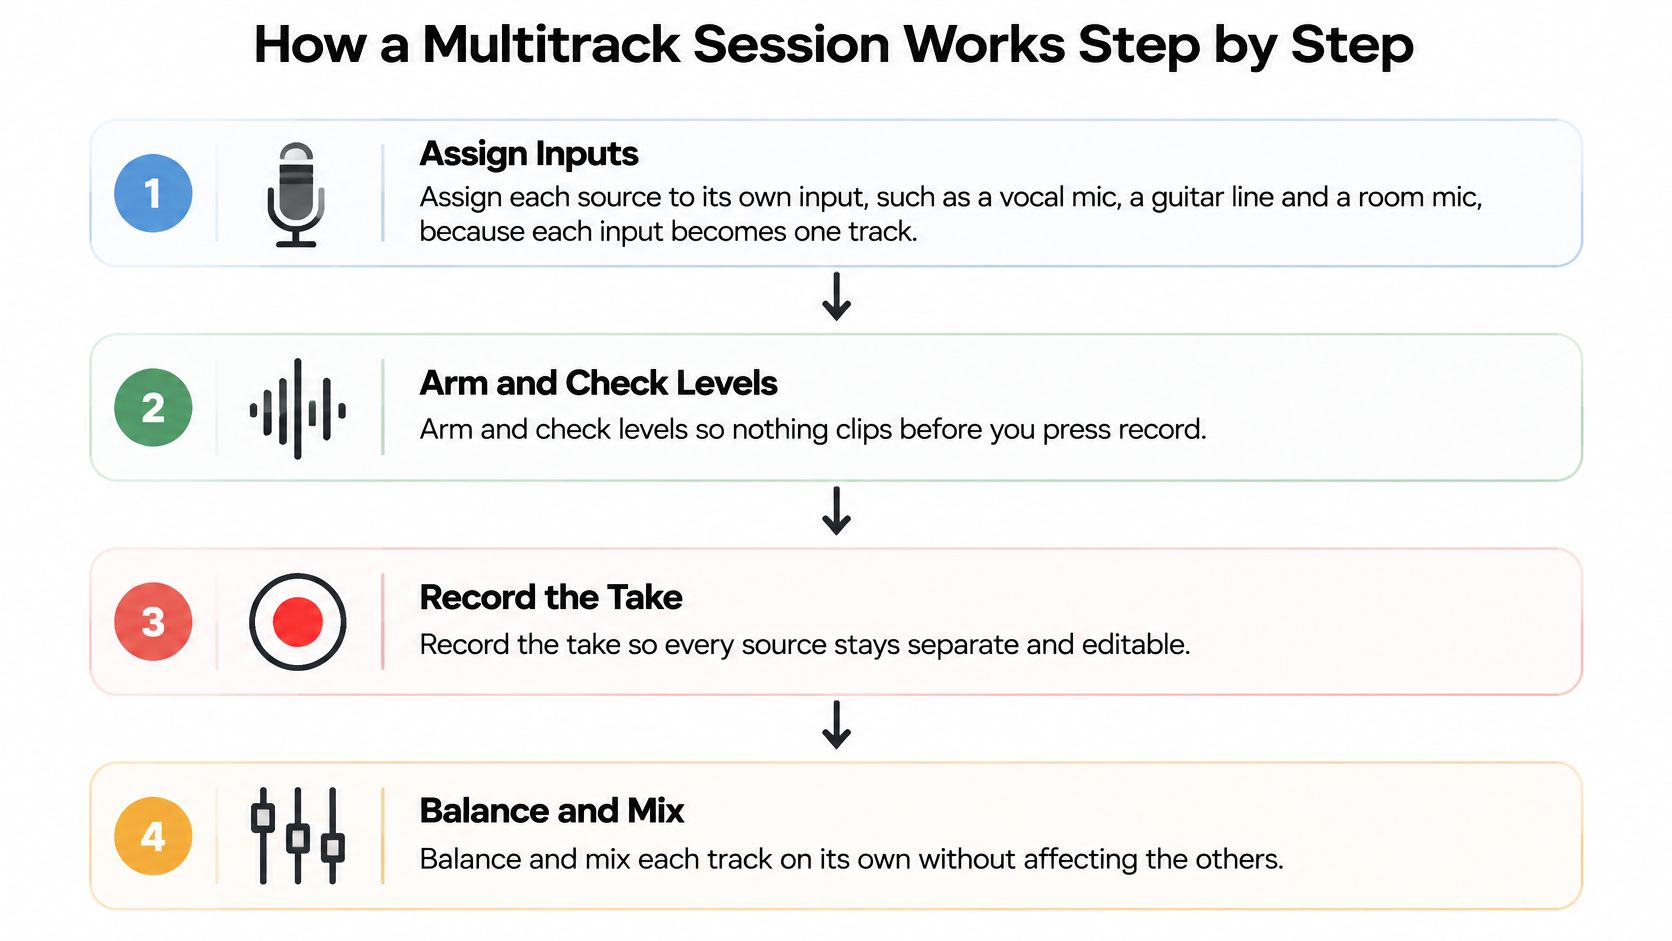
This visual summarizes the broad capture-to-mix sequence.
Capture first, refine afterward
-
Assign each source to an input. Route the vocal microphone, guitar connection, or room microphone to the intended software destination. The common slip is selecting the combined interface mix for every track, producing duplicates rather than independent recordings.
-
Arm the tracks you intend to capture. Arming tells the app which lanes should write incoming audio when you press Record. Watch each meter respond to its assigned source, because hearing sound through headphones doesn't prove you're recording it.
-
Establish the foundational performance. For an overdubbed song, record the rhythm or main part and check its timing before adding layers. For a live discussion, capture the participating sources together instead; recording a conversation sequentially isn't a substitute for simultaneous inputs.
-
Overdub while monitoring through headphones. Add the next performance while listening to the established material so phrasing and timing fit. Loudspeaker monitoring can feed the earlier recording back into the new microphone, reducing your ability to edit cleanly.
-
Edit before polishing the mix. Trim unwanted starts, repair a suitable replacement phrase, and remove isolated distractions without shifting neighbouring material accidentally. Keep original recordings available so an overenthusiastic edit doesn't become permanent.
-
Balance, process, and export. Set relative levels, use panning where appropriate, and add effects only when they improve the result. Export the listening mix, but also save the editable project; a finished stereo file doesn't preserve all your session controls.
The video provides another way to follow the recording process while comparing it with your own app.
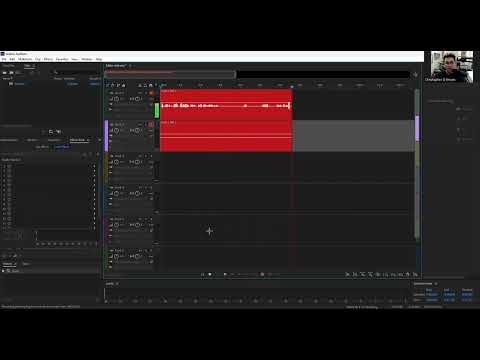
A completed session should contain clearly labelled tracks, retained source recordings, and an exported mix you've listened to outside the project. Check the beginning and ending as well as the busiest passage.
If you'd like structured tuition beyond a first session, you can study music technology online through The Online College of Art & Design (OCAD). Guided practice can help connect recording decisions with arrangement and critical listening.
Sync, Bleed and Dropouts That Break Multitrack Takes
Synchronization is often harder than creating tracks. A recording can look organized on screen while a delayed response, drifting device, or missing passage makes the conversation difficult to follow.
Technical work published in the NIME proceedings on multitrack audio systems identifies timing variation at multiple points in the transmission path. Don't assume separately captured signals arrive together merely because you started the devices at the same moment.
Diagnose the timing pattern
A fixed offset means a track stays consistently early or late. Drift means the alignment changes as the recording progresses, which can happen when independent recording devices don't maintain matching clocks.
Make a sharp clap that all local microphones can hear near the beginning. Compare the transient peaks in the editor, remembering that microphones at different distances naturally receive sound at different times.
- Check another shared event later. In a hypothetical long class, repeat the check after about an hour or compare a clear shared sound near the end. Increasing separation indicates drift rather than just a starting offset.
- Correct carefully. Move a consistently delayed track as a whole; use appropriate time adjustment for genuine drift. Preserve an untouched copy before making either correction.
- Test the recording chain. Matching sample-rate settings helps prevent format problems, but it doesn't make unrelated devices share a clock.
Separate lanes can still contain overlapping sound
Bleed occurs when a microphone captures a source intended for another track. If you mute the guest's microphone but still hear the guest through the host's microphone, you haven't found a routing fault. You're hearing the room.
Delayed versions of the same sound can also interfere when combined, sometimes producing a thin or hollow result. Listen with tracks together before deciding that every available microphone improves the mix.
Move microphones closer to their intended speakers, reduce unnecessary open microphones, and use headphones for playback. Our guide to reducing background noise on a microphone offers additional placement and noise-control techniques.
For dropouts, inspect and audition each source rather than trusting the combined waveform. Another microphone may contain a usable fallback, but label that substitution instead of treating it as an equally clear original.
A dependable mixed recording is more useful than separate tracks you can't align or understand.
Review speech transcripts against the audio, especially speaker changes and technical instructions. A plausible sentence attached to the wrong speaker can misrepresent what happened.
Where Multitrack Recording Shows Up in Practice
A podcast with competing microphone problems
Say a host interviews two guests, each using a dedicated microphone. One guest shuffles papers while the host asks a question. The editor can lower that guest's inactive microphone without lowering the host.
That advantage shrinks when everyone sits close together in a reflective room. The editor still needs to listen for paper noise captured by the other microphones rather than assuming the problem disappeared.
A band building an arrangement
A band records drums, bass, guitar, and vocals as separate layers. The guitarist can replace an unsuitable part while the rhythm section keeps its original performance, provided the replacement matches the arrangement and timing.
Collaboration introduces a related distinction: stems are grouped exports, such as combined drums or backing vocals, rather than necessarily every original track. Drumloop AI's guide to sharing stems with other producers is useful when deciding what another musician needs to receive.
Before sending material, agree on whether the recipient wants editable individual recordings, grouped stems, or a listening mix. Keep a shared start position so imported parts retain their intended placement.
A lecture with several audio feeds
A lecturer's microphone captures the explanation, a room microphone captures student questions, and a presentation feed captures demonstration audio. Keeping them distinct can help an editor identify which source contains an unclear passage.
Permission comes before upload or sharing. Students are responsible for complying with their institution's recording policies and obtaining any necessary instructor consent before uploading lecture recordings.
The University of Victoria's 2025 classroom-recording review describes accessibility and flexibility benefits alongside instructor concerns about privacy, technology, and workload. A useful recording arrangement therefore needs more than functioning microphones.
- Give participants notice: Explain what you'll capture and why.
- Limit distribution: Decide who can access the recording and when it should be deleted.
- Handle sensitive passages deliberately: Don't circulate personal disclosures because they appear in a recorded class.
Check your export against the destination's supported audio file formats, and audition it before uploading. The same source separation that helps identify speakers also makes individual contributions easier to extract, which is why consent matters.
Choose Single-Track or Multitrack for Your Next Recording
Choose single-track when you need a straightforward record of an event and don't expect source-specific changes. A personal voice note, an individual explanation, or an interview kept intact may not justify a more complicated recording chain.
Choose multitrack when your intended edit requires independent access to particular sources. That might mean replacing a musical performance, adjusting an interview participant, or keeping presentation playback distinct from classroom speech.
Make the choice concrete
Before the next session, write down the change you might need to make afterward. If your answer is “listen again,” prioritize a clear microphone position and dependable capture. If it's “remove the music while keeping the discussion,” preserve those sources separately.
- List your sources: Include playback and remote participants, not just physical microphones.
- Choose useful tracks: Give each retained layer a clear editing purpose.
- Rehearse the complete path: Record a brief sample, reopen it, and confirm the result before capturing anything important.
For lecture study, ClassLecture.ai lets you record in the browser or upload an audio or video recording, then turn it into a searchable timestamped transcript. You can study with your class materials and ask questions with answers tied to exact lecture moments.
Keep the original recording available and check transcript passages against it before relying on them. Better capture makes that review easier, but automated text still needs human judgment.
Pick the simplest setup that gives you the control you need after the recording ends.
Turn your next permitted lecture recording into material you can revisit and question. Visit ClassLecture.ai to record or upload a lecture, search its timestamped transcript, and review answers alongside the exact lecture moments they reference.
The ClassLecture.ai Team
We build ClassLecture.ai, the AI study assistant that turns your recorded lectures into transcripts, summaries, flashcards, and answers cited to the exact timestamp — so you learn faster from your own professor's words.
Keep reading
Can I Record a Meeting? When It Is Legal and How to Do It
Can I record a meeting? Usually yes, but consent rules vary by location. Learn when it's allowed, how to capture audio and stay compliant.
ReadHow to Record a Google Meet Call: Guide for Students
Learn how to record a Google Meet call with our step-by-step guide for students. Get tips on saving, sharing, and accessing your recordings in 2026.
ReadHow to Record a Meeting for Better Study Notes
Learn how to record a meeting with clear audio, handle consent, and turn live sessions into interactive study guides and flashcards using ClassLecture.ai.
Read