Google Meet AI Note Taker: How to Study from Lectures
Use a Google Meet AI note taker to capture lectures, check timestamped transcripts, and build summaries, flashcards and Q&A you can verify.

It's week six, the midterm is in four days, and the lecture you half-remember about dose calculations is sitting in a Google Doc titled after the meeting, unopened since the day it was created. You remember the room, the slides, the part where the lecturer said "this one always comes up." You can't remember what "this one" was.
This is the gap a Google Meet AI note taker is supposed to close, and it can, as long as you stop treating its output as a finished record. What follows walks you through the whole chain in order: choosing a capture route your account supports, clearing permission before anything is recorded, capturing clean audio, checking the transcript where it's weakest, and turning it into summaries and flashcards you can defend in an exam. Every AI output in this pipeline is a draft with a timestamp attached. Your job is to check the draft against the moment it came from.
Table of Contents
- Pick the Capture Route Your Account Supports
- Permissions and Privacy Before You Record a Class
- How to Capture Google Meet Audio Step by Step
- Reading Timestamps and Speaker Labels Accurately
- Turning the Transcript Into Summaries, Flashcards and Q&A
- Run One Session and Check It Before You Study
Pick the Capture Route Your Account Supports
Decide how you'll capture a lecture before it starts, not after a session you can't recover. The order matters because Google's built-in note taker isn't available to everyone who uses Google Meet, and a student on a personal account can spend a whole term waiting for a button that never appears.
Google launched Take notes for me in Meet on August 27, 2024, for selected Workspace customers, according to the Workspace Updates announcement. The first version worked only on computers and laptops, only in spoken English, and only on specific paid offerings, including Gemini Enterprise, Gemini Education Premium and AI Meetings & Messaging. Its output was a notes document attached to the meeting's Calendar event, so the record lived inside the organization's permissions rather than in the student's own files.
Google widened the feature through 2025: a suggested next steps section on February 18, 2025, seven more languages on March 12, 2025 (French, German, Italian, Japanese, Korean, Portuguese and Spanish, bringing the documented set to eight with English), and general availability on Business Standard and Plus, Enterprise Standard and Plus, and the Gemini Education Premium add-on, as the follow-up Workspace Updates post describes. One language per meeting, though. Google stated that multilingual meetings weren't supported at that point, so a seminar that drifts between two languages gets partly captured at best.
Capture routes for a recorded Google Meet lecture
| Route | Best for | Requirements | What you get |
|---|---|---|---|
| Google Meet Take notes for me | Live meetings on a Workspace or AI plan | Eligible paid edition, computer or laptop, one of eight supported languages with no mixed-language speech | Notes Google Doc attached to the Calendar event |
| ClassLecture.ai Record Meeting | Live Zoom, Google Meet or Teams class | Desktop Chrome or Edge, tab or system audio | Searchable transcript with cited timestamps |
| Upload an existing recording | Lectures you already captured | An audio or video file already on your device, such as MP3, MP4, M4A, WAV, MOV or WEBM | Transcript and study materials built from the file |
Read the table against your own account. If your school or employer runs an eligible Workspace or Google AI plan, start with Google's notes and plan to check them, because they arrive attached to the class event with no extra setup. If you're on a personal account, that route is closed to you, and the useful move is to record the session from your browser or upload a recording the instructor already posted.
Practical rule: pick one route now, before the next lecture, and confirm it works on a short recording. Discovering your capture route doesn't function ten minutes into a two-hour class costs you the class.
Permissions and Privacy Before You Record a Class
Before you open a recorder or click the pencil icon in Meet, answer the question most students skip: may I capture this at all? Google's Meet notes documentation notes that administrators may require explicit participant consent before note-taking, recording or transcription begins, and that availability depends on your account type. The generated notes land in Google Docs and are shared with designated recipients, which means a capture decision is also a sharing decision.

Run three checks before any capture starts.
- Clear it with whoever controls the session. Check the course policy, the syllabus statement or the meeting host's instructions. If your administrator requires consent for transcription, that requirement covers the AI note taker just as much as a phone recording.
- Ask the people in the room. Classmates, guest speakers and anyone joining from a clinic or workplace deserve a heads up before their voice becomes searchable text. This matters most in seminars where people share personal examples.
- Drop the sensitive parts. Google's documentation points out that confidential discussion can be excluded. If a class moves into case details about real patients or clients, stop the capture rather than cleaning it up later.
If you're weighing whether recording is allowed at all, our guide to whether you can record a meeting sets out the policy questions to answer first.
Ownership is the next question, and it trips up more students than consent does. When a school, employer or guest hosts the meeting, the record sits under their control. If the instructor has disabled note-taking, a personal study copy isn't automatically yours to make, even with a paid tool waiting in the next tab. Ask in writing and keep the answer.
Then decide what you'll do with the file. Keep study copies private, delete recordings that contain classmates' personal information once revision is done, and don't redistribute anything. We don't sell, share or use your lecture recordings and documents to train outside AI models, and some of our data is processed by third-party services, including OpenAI and Stripe. Check any provider's current privacy policy yourself rather than trusting a summary line, including ours. Once a permitted recording exists, the next question is whether the session landed, and tools for checking student understanding help you test recall instead of rereading.
When permission is unclear, take manual notes and skip the recording. No transcript is worth a conduct conversation.
How to Capture Google Meet Audio Step by Step
A clean capture starts before anyone speaks. Run this sequence the first time, then repeat it until it's automatic. Each step carries the reason it exists and the mistake that breaks it.
- Confirm the route before the lecture. Check that your Workspace edition or Google AI plan includes Take notes for me, or that your browser recorder is installed and signed in. The common slip is discovering you have no capture route after the class has started, when nothing can recover the missing hour.
- Switch the feature on early. Google lets you enable note-taking from Google Calendar, the Meet pre-join screen, or inside the call. Enabling it at minute twelve means the opening definitions, the ones the rest of the lecture leans on, were never captured.
- Set the language. One supported language per session. A bilingual seminar looks fine on screen and loses sections without warning, which you won't notice until a flashcard contradicts the recording.
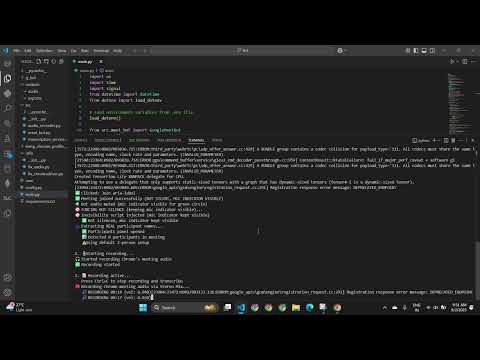
- Choose the right audio source for a self-capture route. Open the recorder in Chrome or Edge, select the Zoom, Google Meet or Teams source, then pick tab audio or system audio. The mistake here is a muted tab or the wrong window, which produces a transcript of silence.
- Add your microphone only if you want your own voice in the file. Mixing it in is useful when you ask questions; it also picks up keyboard noise and the person beside you.
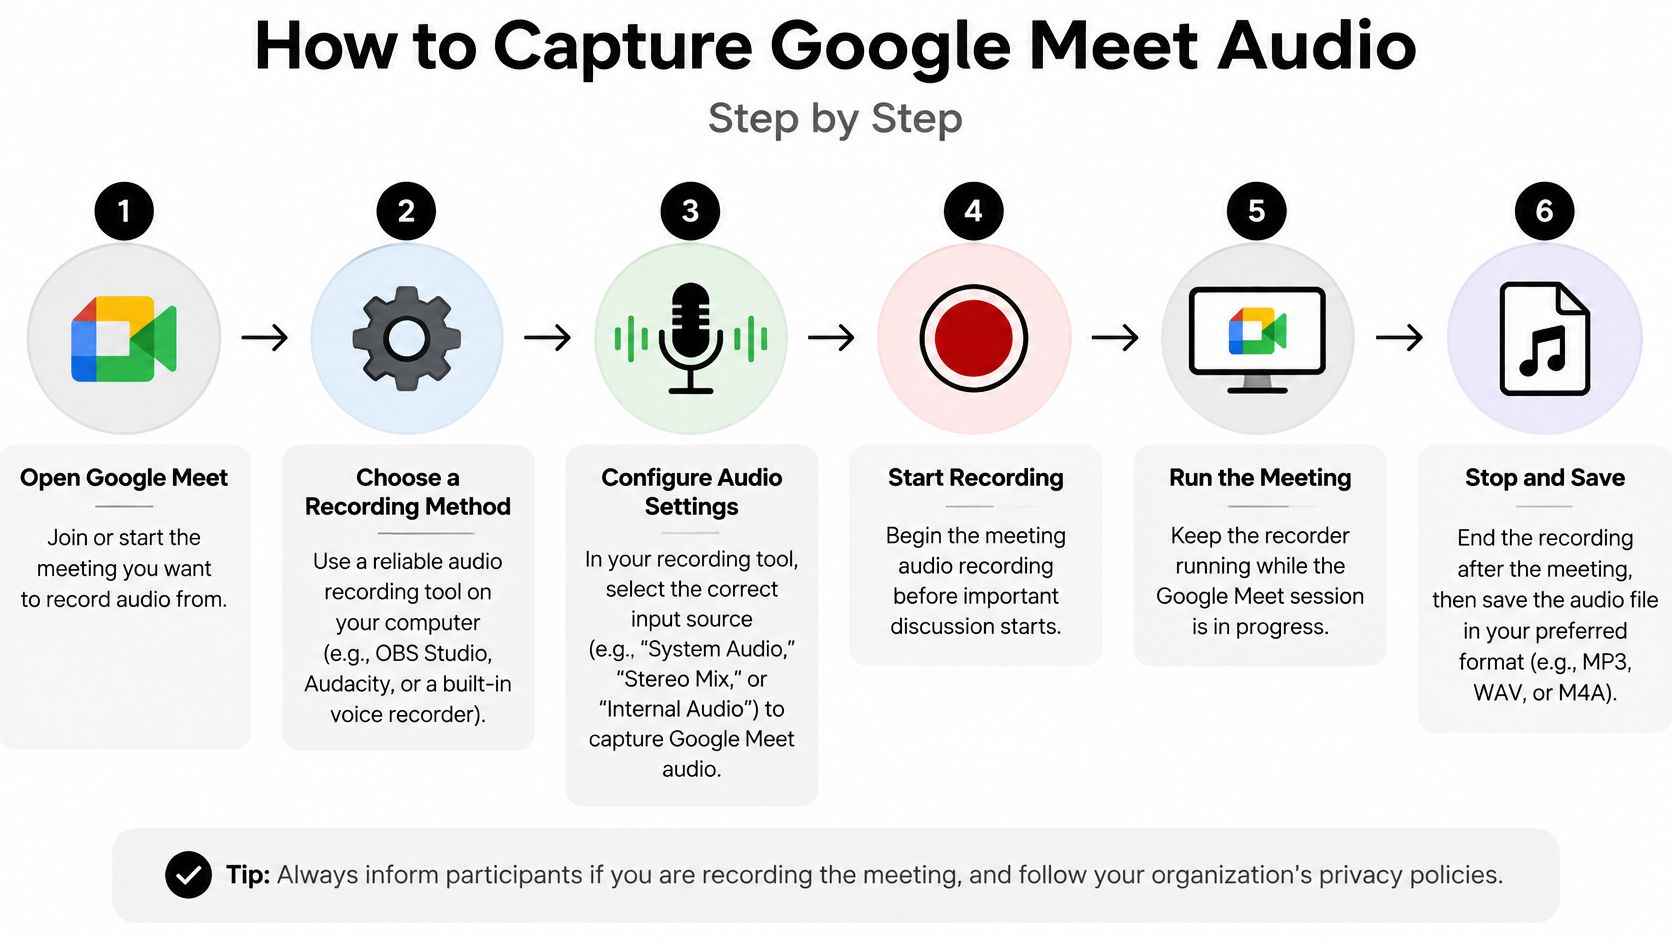
- Start before the lecturer does. A late start loses the framing, and framing is what turns a list of facts into something you can answer questions about. If you join late, write the missing start time in your own notes so you know the transcript has a hole.
- Stop at the end and file everything together. Wait for processing to finish, then confirm the recording, transcript and notes are saved in the same class folder. Google's Meet help page on taking notes recommends sessions of roughly 15 minutes to a maximum of 8 hours, and warns that summaries can be incomplete, inaccurate or absent because of connectivity problems, policy issues or unsuitable meeting length. Split a double-length seminar rather than trusting one file to hold the whole afternoon.
A complete capture gives you three things: the original audio, a timestamped transcript, and a notes document. Treat that transcript as a first draft, not the finished product. Upload the audio to ClassLecture.ai and it transcribes the lecture, then lets you ask questions, generate summaries and study guides, and build flashcards from the content. Every claim it produces is worth checking against the timestamped audio before it becomes something you memorize.
Reading Timestamps and Speaker Labels Accurately
Speaker labels are the weakest layer of a transcript. An independent benchmark that evaluated five modern diarization systems across 196.6 hours of multilingual audio reported a best diarization error rate of 11.2%, with a competitive open-source system at 13.3%, per the diarization benchmark study. Diarization error combines missed speech, false speaker activity and speaker confusion, so even the strongest system misassigned roughly one in nine speaker-time units under controlled test conditions.
A lecture hall is harder than a benchmark recording. Distance from the microphone, reverberation, students talking over each other and quick interjections all push the error rate up. The transcript text is AI-generated too, so it deserves the same scrutiny as the labels. Treat both as a first draft: words get smoothed over, qualifiers get dropped, and the name attached to a sentence may belong to someone else.
Here's a ten-minute check you can run on any transcript before you study from it.
- Search for the term you need, not the whole lecture. You're looking for one definition, one formula, one number.
- Jump to its timestamp and listen to 30 seconds either side. You catch a dropped qualifier there, like "not" or "except in adults."
- Compare the spoken words with the transcript text. Note anything the transcript smoothed over, especially abbreviations and drug or material names.
- Flag segments where two voices overlap. Those are the ones most likely to carry the wrong name.
- Leave text unlabeled when the speaker is uncertain. A nameless quote you checked beats a confident attribution you didn't.
Say a lecturer defines "permissive hypotension" and a student repeats it back a minute later while asking a question. The notes credit the definition to the student. If you're building flashcards for exam revision, that's now a card attributing a clinical concept to the wrong source. The timestamp exposes the mismatch immediately: the first mention sits earlier in the audio, in the lecturer's voice.
Trust the timestamped audio over speaker names. The audio doesn't guess.
Both the transcript and the notes built on it are AI-generated output that may be inaccurate or incomplete, so check anything you plan to rely on against the original recording. Speech recognition isn't perfect, and a name in a speaker label is a guess more often than it looks. If you're new to how transcripts are produced, this explainer on what audio transcription involves covers the mechanics behind the text and the labels.
Turning the Transcript Into Summaries, Flashcards and Q&A
A 50-minute transcript is raw material for a revision pack. Build in a deliberate order, from the source outward, so the last thing you make is the most compressed. Start with a summary of one lecture where each main claim carries a timestamp. Move to a study guide that lists key terms in the order the lecturer introduced them. Then build flashcards from definitions, formulas and named terms, and finish with question and answer pairs aimed at the specific points you expect to be tested on. If your tool gates summaries by plan, check that first; on ClassLecture.ai, automated lecture summaries are available on select plans.
Each artifact needs a different check before it earns a place in your revision.
Study artifacts, what they come from and how to check them
| Artifact | Built from | Check against | Best used for |
|---|---|---|---|
| Summary | Full transcript or one lecture segment | Timestamp for each main claim | Weekly review of the big picture |
| Study guide | Summary plus key terms in lecture order | Slides or readings for named diagrams | Organizing a whole topic before an exam |
| Flashcards | Definitions, formulas and named terms | Audio at the cited moment | Spaced recall before tests |
| Q&A pairs | Specific questions asked in the lecture | Source passage with timestamp | Testing understanding of one point |
The check is what turns generated text into study material. Google's own documentation warns that summaries can be incomplete, inaccurate or not generated at all, per the Meet notes help page. A generated card can drop a qualifier, round a number or swap a term for a near neighbour and still read perfectly well. For Q&A, keep the scope narrow when precision matters: draw from audio transcripts only, uploaded notes and textbooks only, or both combined, then follow each cited timestamp or page reference back before you rely on the answer.
Where the transcript goes blind
Lecturers point. They gesture at a slide, a diagram, an equation or a demonstration and say "like this" without describing what "this" is. Transcripts capture the words but usually miss charts, diagrams and slides, so the visual content needs a note of its own.
Your fix is manual and takes seconds. Note the slide number in your own document, screenshot the slide if the class allows it, and write one sentence of context by hand: what the diagram showed, which curve moved, which step of the procedure was highlighted. When you review later, the handwritten line tells you the transcript is thin at that point.
Treat every card as a claim with a receipt. If you can't point to the moment it came from, it doesn't go into spaced review.
One more line to hold. Use AI-generated material for your own revision, attribute it when it contributes to graded work, and keep the boundary between study aid and submitted thinking clear. Seminars and written work often overlap, so if you're building academic vocabulary alongside your revision, these English essay and seminar skills pair well with lecture notes. When you're ready to turn checked cards into a schedule, this guide to the best way to make flashcards covers spacing and wording.
Run One Session and Check It Before You Study
Don't rebuild your study routine around a tool you haven't tested. Run one session this week, on a lecture you already understand well enough to grade the output.
- Record a 20-minute segment of that lecture.
- Check the transcript for five facts you know were said.
- Verify two timestamps by listening to the audio around them.
- Generate one summary and five flashcards.
- Check each card against its source moment.
- Write down what was missed, and whether a slide or demonstration caused the gap.
Then decide. If the transcript holds up, record the next full lecture and keep the summary and cards in the class folder. If it loses technical terms or mislabels speakers, keep manual notes for that class and use the recording only for timestamp lookup when a definition matters.
A tool that fails your test on one lecture hasn't failed you. It has told you exactly which classes to trust it with.
Be honest about the ceiling here. Transcripts and AI chat responses are generated output that may be wrong or incomplete, and no tool, ours included, can promise that transcripts will be accurate or complete or that grades will improve. What a good setup does give you is the ability to ask questions about your own lectures and get answers with audio timestamps, drawn from the material you chose rather than from general knowledge, with citations back to the source so you can check. That's a study aid, not an answer key.
ClassLecture.ai turns a Google Meet, Zoom or Teams class into a searchable transcript you can question, with answers cited back to the moment in the audio, plus summaries, study guides and flashcards built from your own lectures. Record a live session from Chrome or Edge, or upload a recording you already have, and it organizes everything by class and term. Try it on one lecture this week at ClassLecture.ai and check the timestamps yourself before you trust a single card.
The ClassLecture.ai Team
We build ClassLecture.ai, the AI study assistant that turns your recorded lectures into transcripts, summaries, flashcards, and answers cited to the exact timestamp — so you learn faster from your own professor's words.
Keep reading
How to Record a Google Meet Call: Guide for Students
Learn how to record a Google Meet call with our step-by-step guide for students. Get tips on saving, sharing, and accessing your recordings in 2026.
ReadAI Powered Study Assistant
Ai powered study assistant - Discover how an AI-powered study assistant turns lectures into searchable transcripts, timestamped answers, and flashcards—and the
ReadLecture Notes AI Explained How It Turns Lectures Into Study
Discover what lecture notes AI does, how it works, its benefits and limits, and how to turn recordings into transcripts, flashcards and Q&A.
Read